The easiest way to determine factions would be to simply split them by location, or world history.
Then, the conflict could revolve around gaining or maintaining territory, and that could include groups being pushed out of their original territories and then trying to take them back.
You can also split it by the each of the area’s history, using previous conflicts to shape the factions, i.e. political ones.
The Characters ready!
Build your factions around your characters’ core beliefs.
What do your characters care about? What is their worldview? What about the opposite?
With a focus on the characters, the creation of the factions can become integral to your OC’s story. Will they need to grow out of the faction? Will the faction grow and change as the character does? Will they leave one for another as their story moves forward?
And conversely: what does being in that faction say about the character? What does a monster being in a Hunter’s faction, for example, say about the monster? Are they guilty? Do they doubt their identity, or are they a wolf in Sheep’s clothing waiting to strike?
Video Games have long graduated from simple fights between good and evil. Games are now tied with intricacies and multiple sides, each believing that they are the ones that are correct.
The question now becomes “How do I put that into my game?”. As with my other articles, there are multiple ways to go about this!
It is best to begin at the beginning!
I want to start with the factions…
The Question to ask here is “Why are there factions in the first place?”
Usally a group splits over an arguement; as creator, you decide what kind of disagreement causes the breakup.
What do people believe in enough that their goals and ideals split? Is it something simpler, like a land disagreement or a family squabble? Are the factions gunning for power, splitting politically? Are the factions after a superweapon, an their reasons for wanting it are causing the divide?
In this way, the creation of the factions and therefor, their very existence drives the story.
Emphasis
By creating them first, it puts more emphasis on them, rather than other aspects. This works in your favor if you want to use your story to explore methodologies or philosophies, and what causes people’s differences.
Having factions be at the center of your story allows for discussions with lines drawn in the sand, and it’s up to you (or your players) to decide if they stay, move, or fade entirely.
Effect
A good way to gauge how much your factions affect the story you’re creating is this:
What happens if something about the faction changes?
If destroying the faction of choice does nothing, then it has no impact on the story. This isn’t necessarily a bad thing: If it impacts the World or the characters, it can stay! Asking this question can help gauge how much you want to focus on that faction. If it’s deemed insignificant, than you can skim over it, or maybe change your story if you’re really attached to the idea of it.
What does the faction add to your story?
As mentioned above, if the addition of this faction bolsters other parts of your story, it should stay in. Depending on how much it affects the rest, you can draw the players/readers attention to it by having the story be more closely tied to the factions.
As a DM, you lead your fellow players in the adventure of a lifetime! And you can’t do that without a setting for your adventurers to traverse!
There a Few ways to do this, like always!
Base it off of a real-life location
You can simply pick a point on the globe and lift the terrain and cities wholesale. This way, you can point your focus towards the plot and characters of your campaign.
Pros:
Makes your life easier
Can use history for flavor
Cons:
Expectations of Culture and mannerisms that come with a person’s knowledge
There will be history here, and the players might expect use of it
Create your own from scratch
Use map generators or craft a map from your own imagination to craft the most individualized map
Pros:
You can have whatever you want wherever you’d like
Create your own world history
Cons:
You have to make it yourself
Create your own world history
Custom maps can be made multiple ways.
Decide on a central or key location, and build what you need around it
Make a legend, and drop dice (signifying different physical objects) over a piece of paper
Random generator
Use a Mix of both!
You can use a real-life map as a base (for terrain or city placement), and then edit it to fit your lore/characters/villain’s actions
There are a few ways to create the ultimate evil for your DnD (or other media) game!
The Standard
Choose from the prototypes of any popular mass media for the skeleton to build your villain off of!
The common tropes in media range from Evil boss to Mass-murdering maniac. The general tropes for a simple villain include a sad backstory, a tendency for murder, and a longing to take over the world by violent means.
The way to impart your generic villain’s actions is to really expand on the scope of their evil deeds. Don’t just mention the widespread destruction, but show it and its aftereffects. Have the village that your players were going to head to be torn apart, have the most trusted villagers mention their hatred of the Big Bad, and how the villain affected them and their livelihoods.
The Foil
Examine your player characters and their motivations. Pick what drives them, and craft a villain that wants something similar, but does it in a completely different way than your player characters.
You can craft a foil from characters the player(s) already know, and they don’t even have to start as antagonists. With the foil, you can also grow their powers/abilities/fear-factor along with the players, to help with scaling their end-game “badness” level.
Worldly type
This is a villain built out of the world you have created. What would mess up the world you have created? What ideology would cause the collapse of the society you have? What is the worst case magical/supernatural/scientific scenario?
Say your world has a heavy dependency on a particular resource: the villain can hoard it, or they could seek to destroy all of it.
Basic World building: Major locations and the breadcrumbs that will lead your players there.
Some starter quest for your players to introduce them to the world or situations you want them to face. This will also serve as a way to help your players figure out the beginnings of where they want to take their characters.
Your Players
Ready by session One:
Character sheets– These can be done as a group (as a “session 0”), or individually with the DM
Backstory– Informed by the world, they can intersect with those of other characters. It might be good to remind your players that the backstory is essentially a “Prologue” to the campaign.
Your Vibes
Ready by session One:
Prospective playlist for encounters: the specifics of which will be up to you. Some DMs like background music, others prefer the actual sounds that could feasibly be on the journey. For music, Video game OSTs can provide what you need. For Sounds, there are YouTube videos with things like 10 hours of ship noises, or failing that, you can look at customizable ambience sites.
Playlists helps your crew get in the mood, and can help with immersion in the story, depending on how you play it.
In part 2, we’ll be using Excel, and the updated version of MS paint (Paint 3d)
Paint 3D
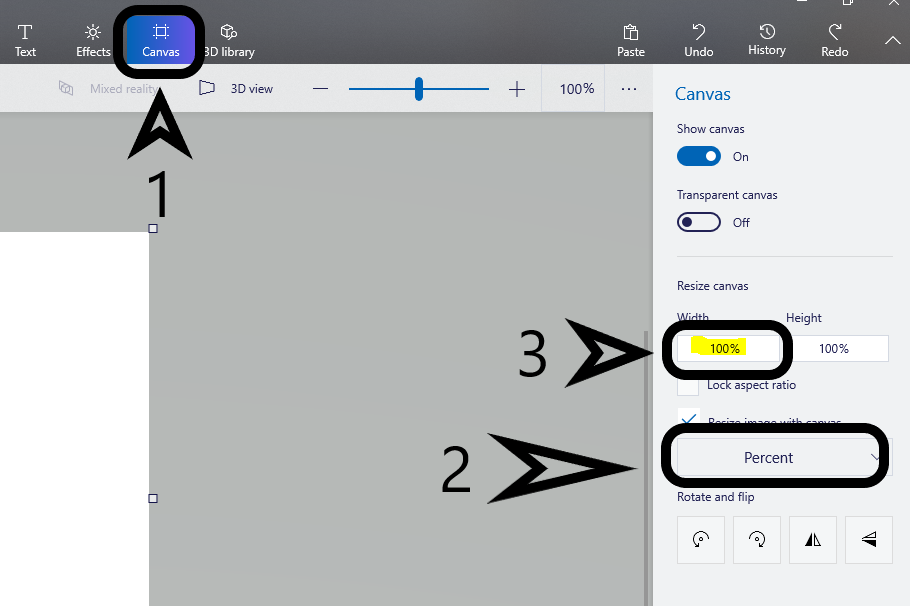
Open up paint 3d! You want to go to the Canvas tab, and switch the sizing from pixels to percent. Type in 30 for the width. Or you can put in the exact pixel size for your card. Pokemon cards are 718 x 1000 pixels.
Step 1
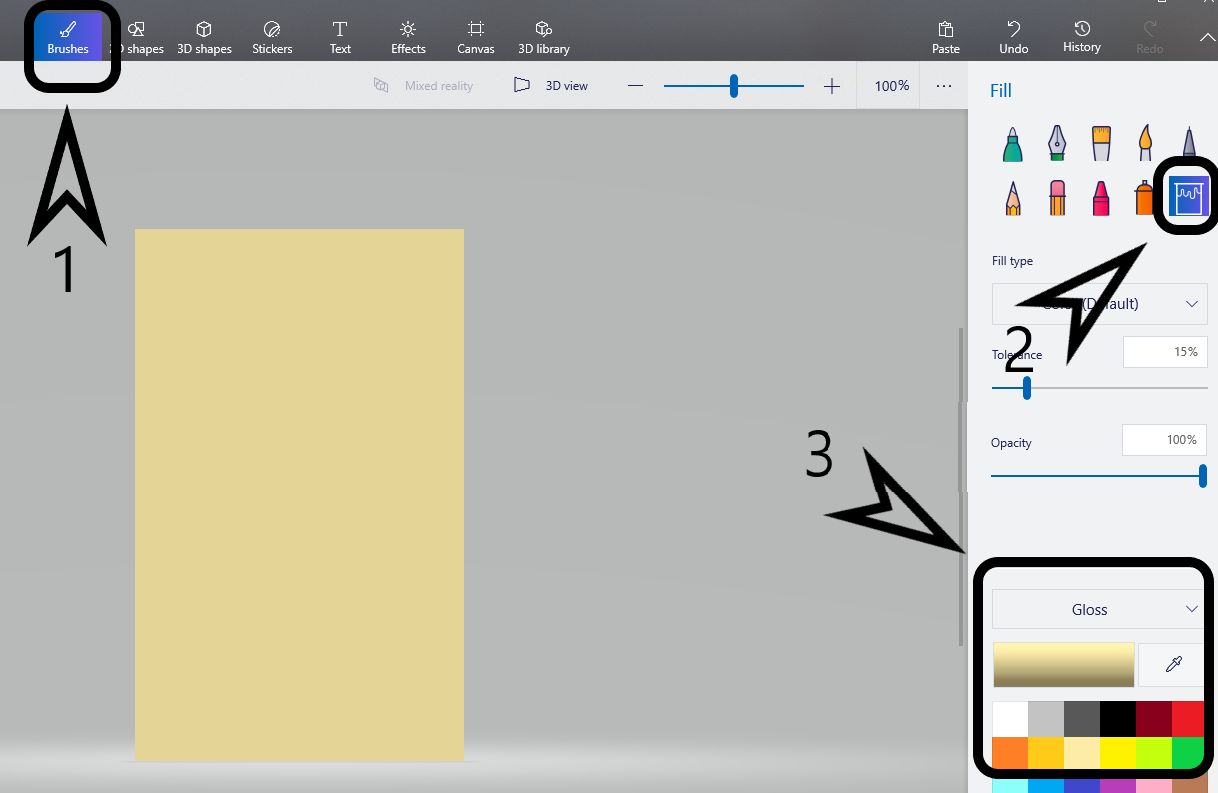
Next, click back to the brushes, select your color and use the bucket (fill) tool on your canvas!
Step 2
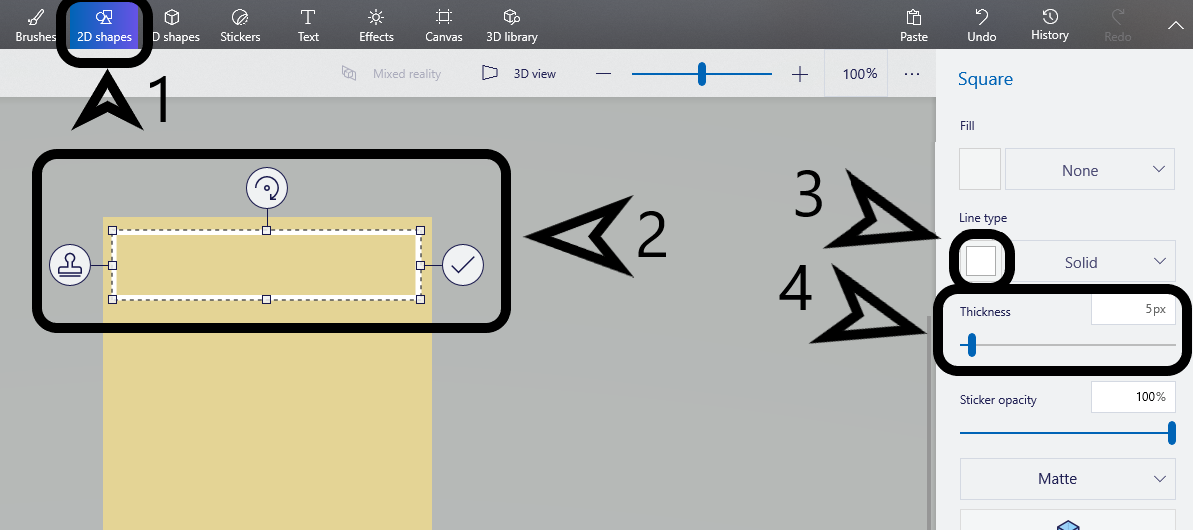
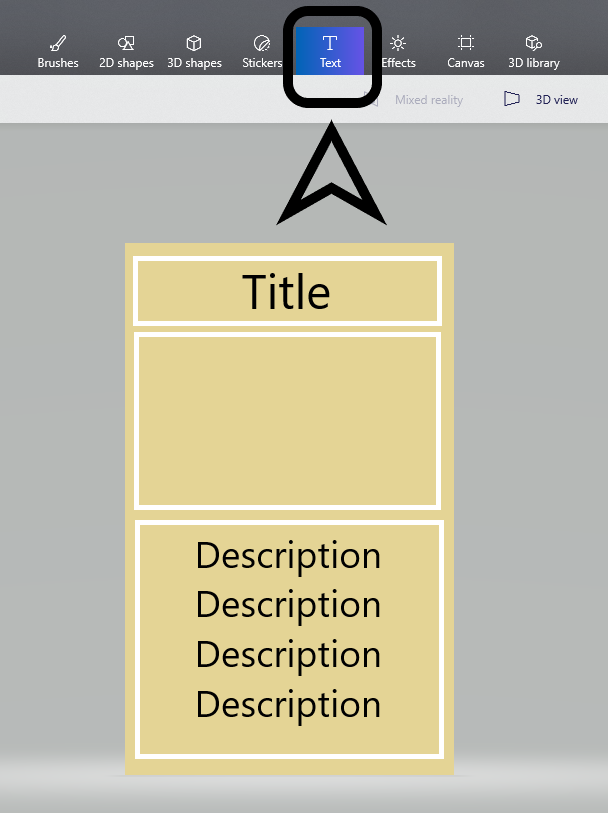
To help figure out what you want, and where, it’s helpful to outline with rectangles! Go to 2D shapes, Pick the rectangle option, drag a corner to grow to the size you want. Then, adjust your line thickness and color to your preference! If the rectangle is a whole shape, you can change it to an outline by changing the fill option to none.
Step 3
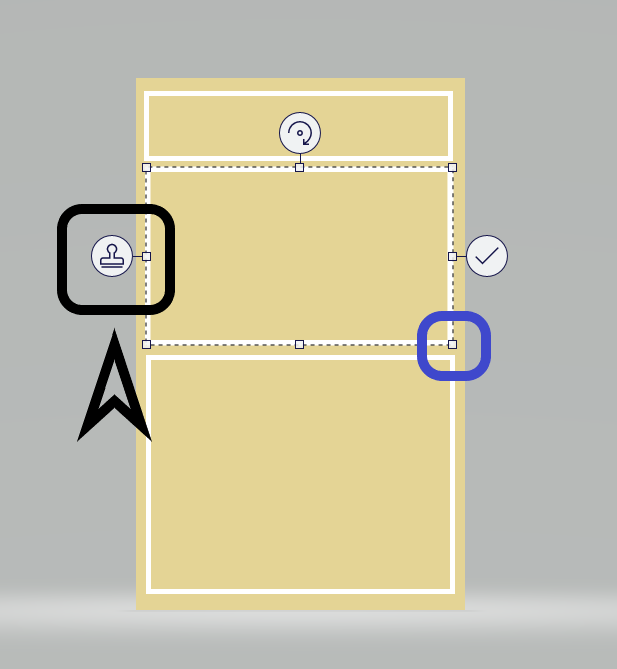
Instead of repeatedly clicking on the 2D shapes, you can use the clone tool. Click the left-most option, and drag the new shape to modify it as you wish!
Step 4
Next, play around with the text options! Make sure to click on the letter “T” in the option bar before clicking where you want to place the text.
Step 5
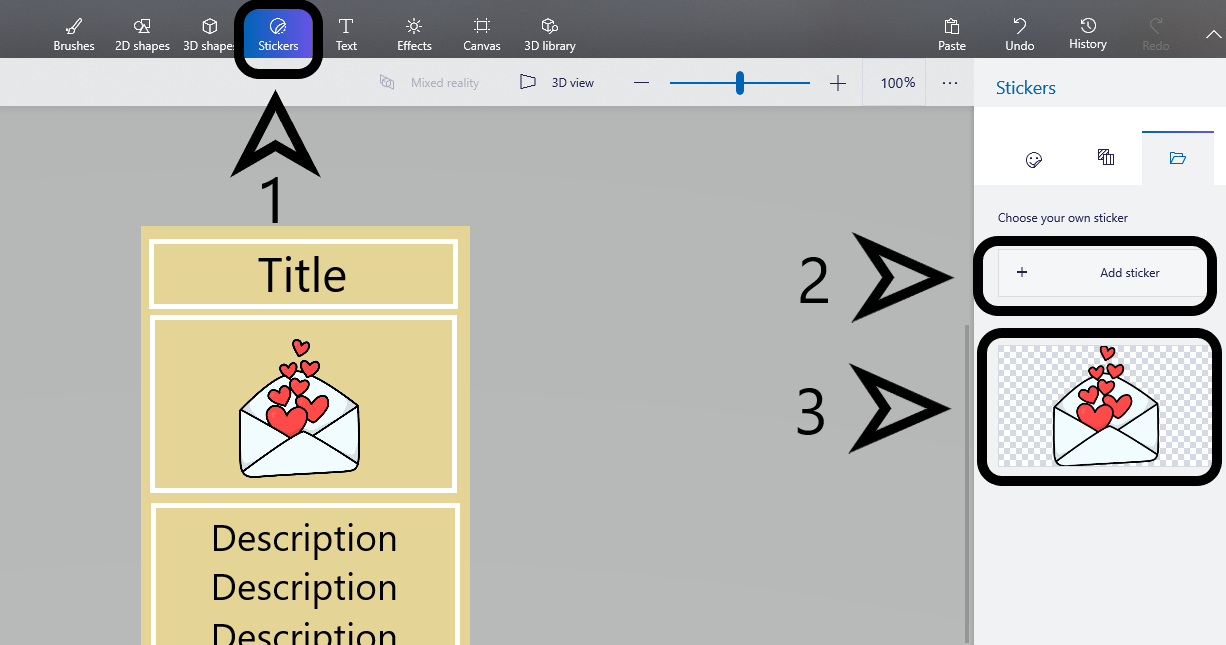
Adding the Image: Go to the Sticker tab, and click add sticker. This uses the images on your device, so you’d have to download the applicable images.
Alternatively, you can also copy + paste an image from online using your keyboard shortcuts.
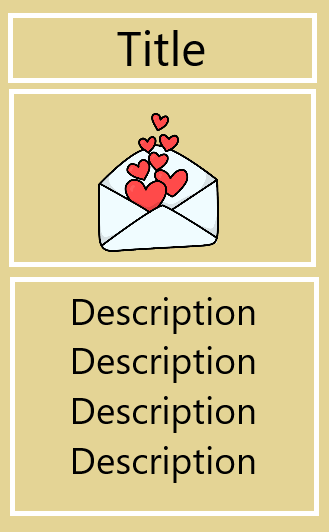
Step 6
Save to your computer!
Step 7
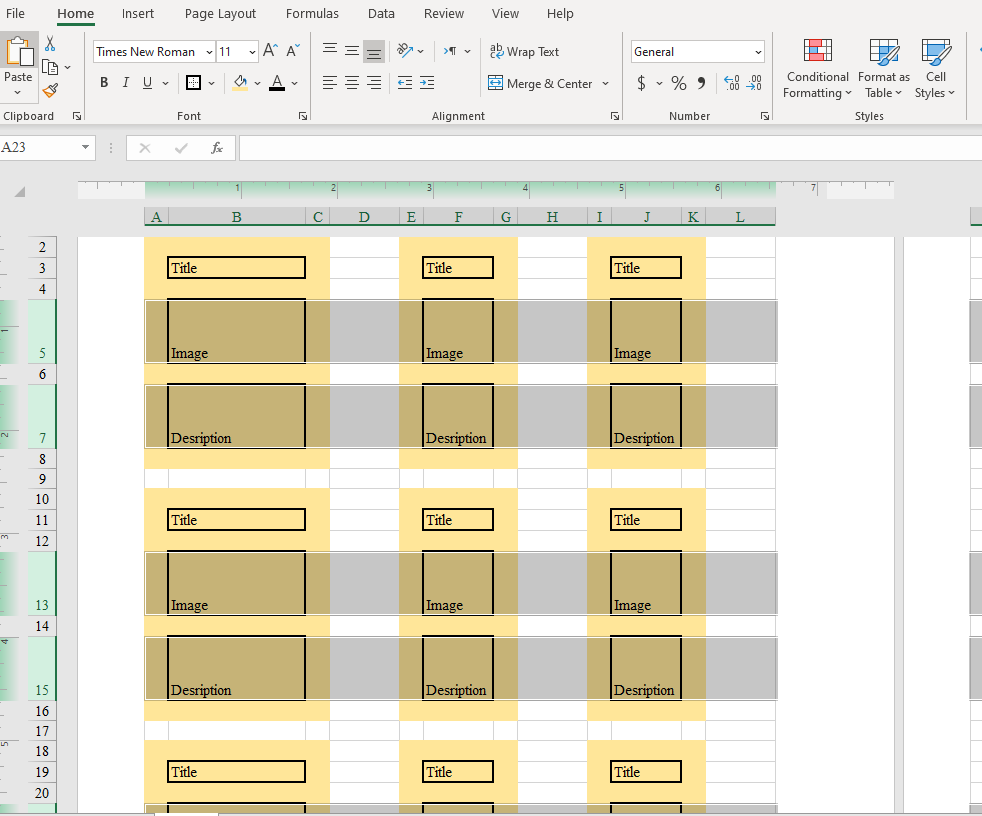
Excel
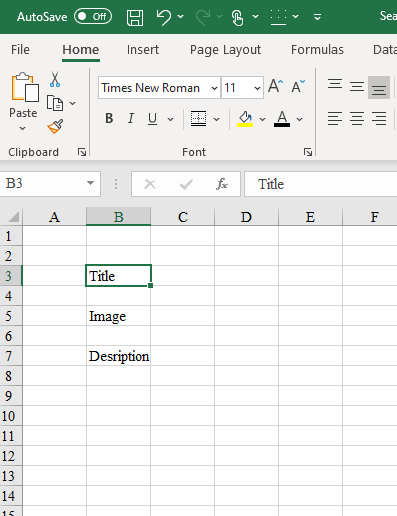
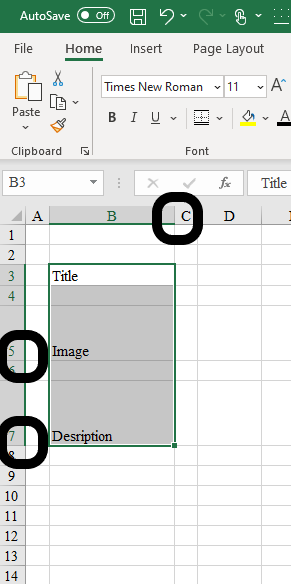
Open up a new tap, and put in what text you want first! Make sure you have some space between the text. make sure there are two rows before the first line.
Step 1
Next, use the numbered and lettered rows and columns to adjust the sizes en-mass. Make A and C skinny- this will be the space between the edge of the card and the text.
Step 2
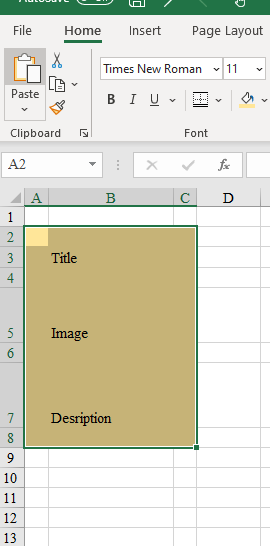
Select A2:C8, and use the bucket tool to fill the whole block in! This will be your base color!
Step 3
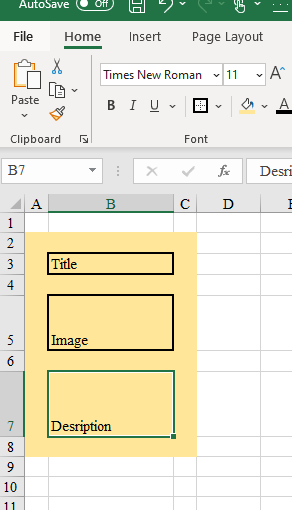
Next, select your text, and use the square button (it’s between the U and the bucket tool), and select the thick, outlined border.
Step 4
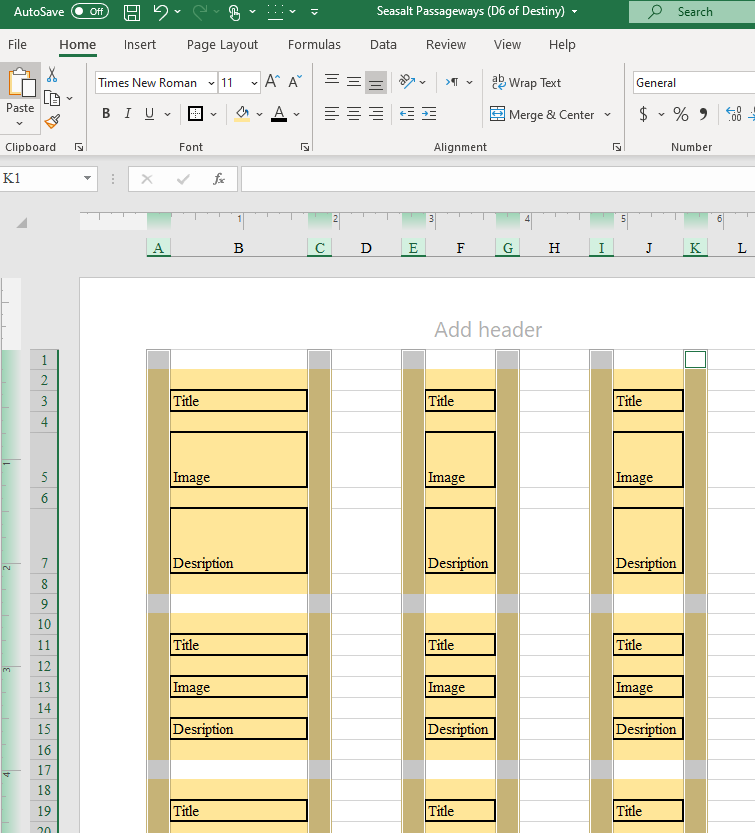
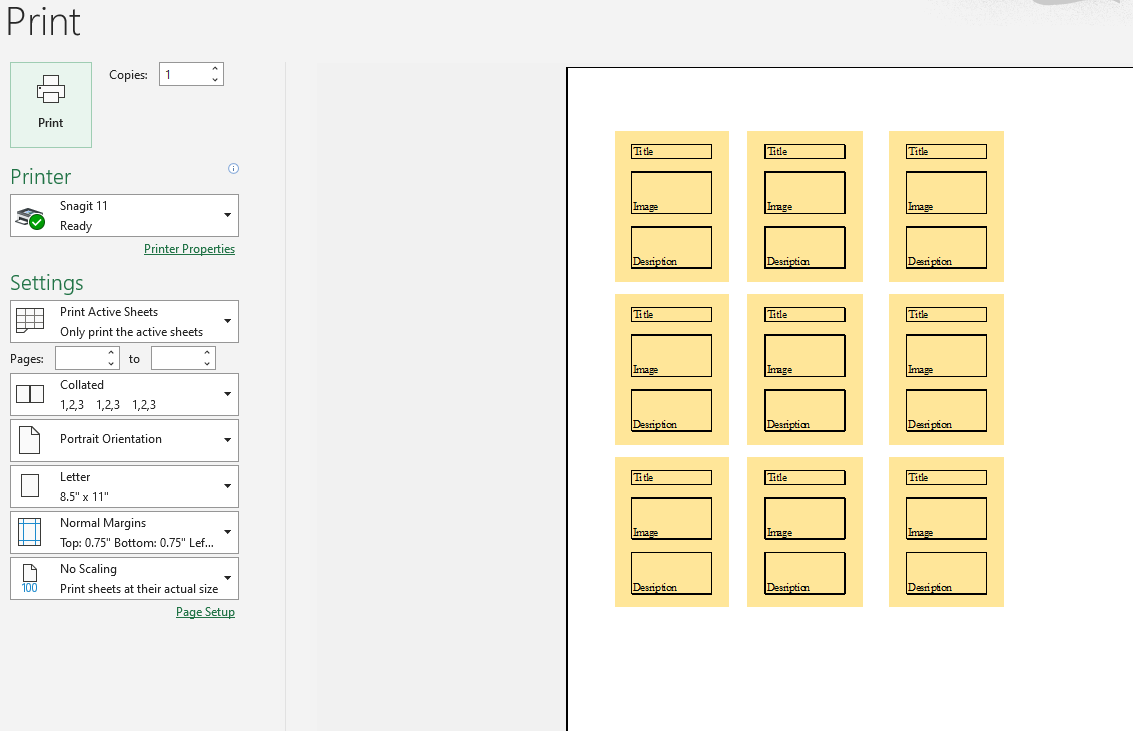
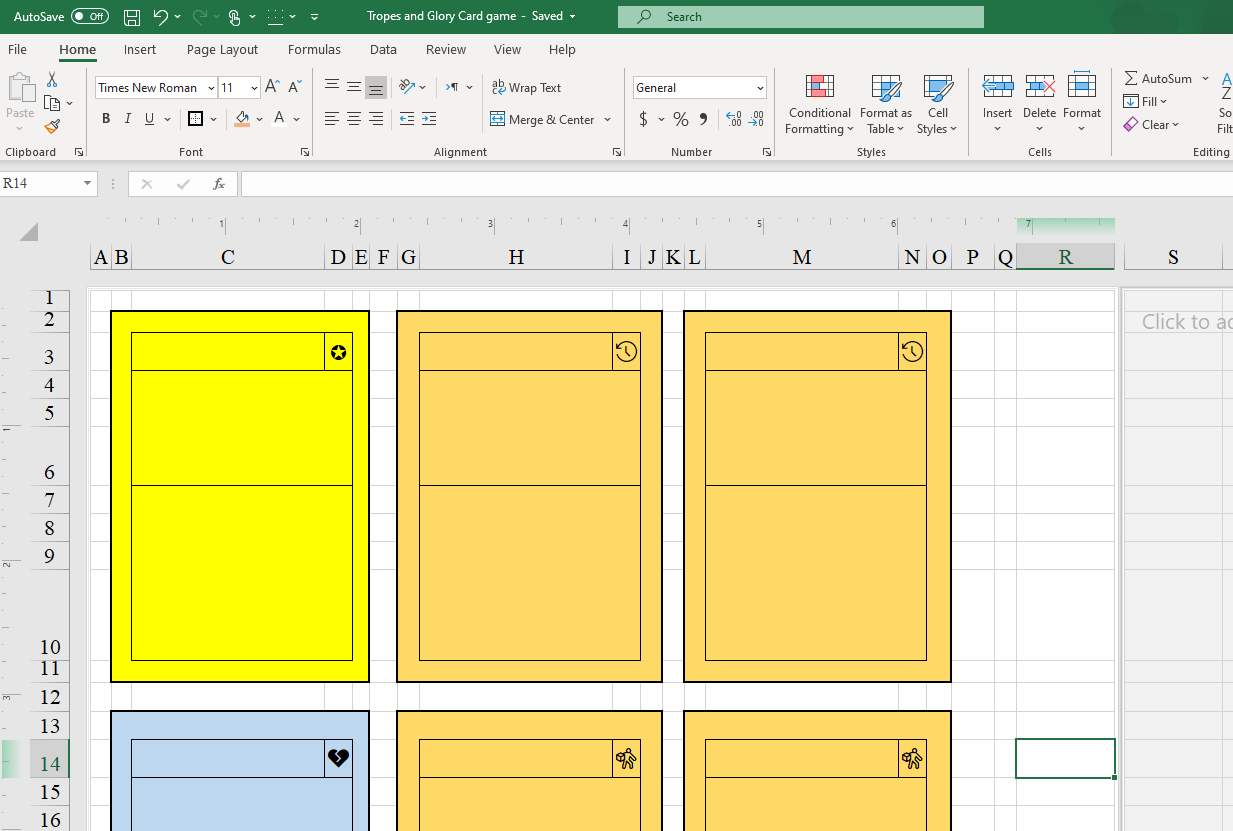
Select your card, and copy and paste it as much as you’d like! Then, select the lettered columns that correspond with the space-filling areas. Adjust the size of one, and it will affect the other highlighted columns.
Step 5
Repeat for the horizonal rows, including the text and description boxes.
No art skills? No problem! If you want to create a card game, and you can do everything except draw, this is for you!
One thing you can do is use other cards as an example, like pokemon cards, Magic cards, or any other game who’s aesthetic you like. If you have physical cards that you no longer care about, you can use white-out on individual lines, or white paint to cover the card. That way, you can write out the information on the cards!
I will show some ways to design cards on your computer!
Let’s start with two classics- MSPaint and Microsoft Word!
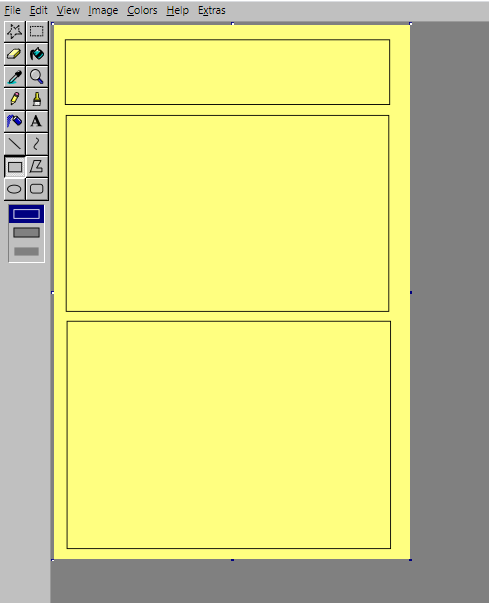
MSPaint
Step 1
Open up a new canvas. Use the bottom right corner to drag to the size you want. Use the Bucket to fill in with a color you want.
Step 2
Use the box-drawing tool to map out where you want the different parts to go (title, image, description). Save a copy of this so you can make as many cards as you want from this base.
Step 3
Write what you want in the boxes you’ve made using the text tool. make sure to click the bottom option if you want the back ground color to show through.
Step 4
If you can’t make an image, find one! Search for what you want, and make sure to select “transparent” in the color options if you wan the background to peek through. If you plan on selling the game, click “Usage rights” and select “creative commons”.
Step 5
Copy and Paste your image onto the card using the left click options.
Final Product
Save your image and admire it! Make as many as you’d like!
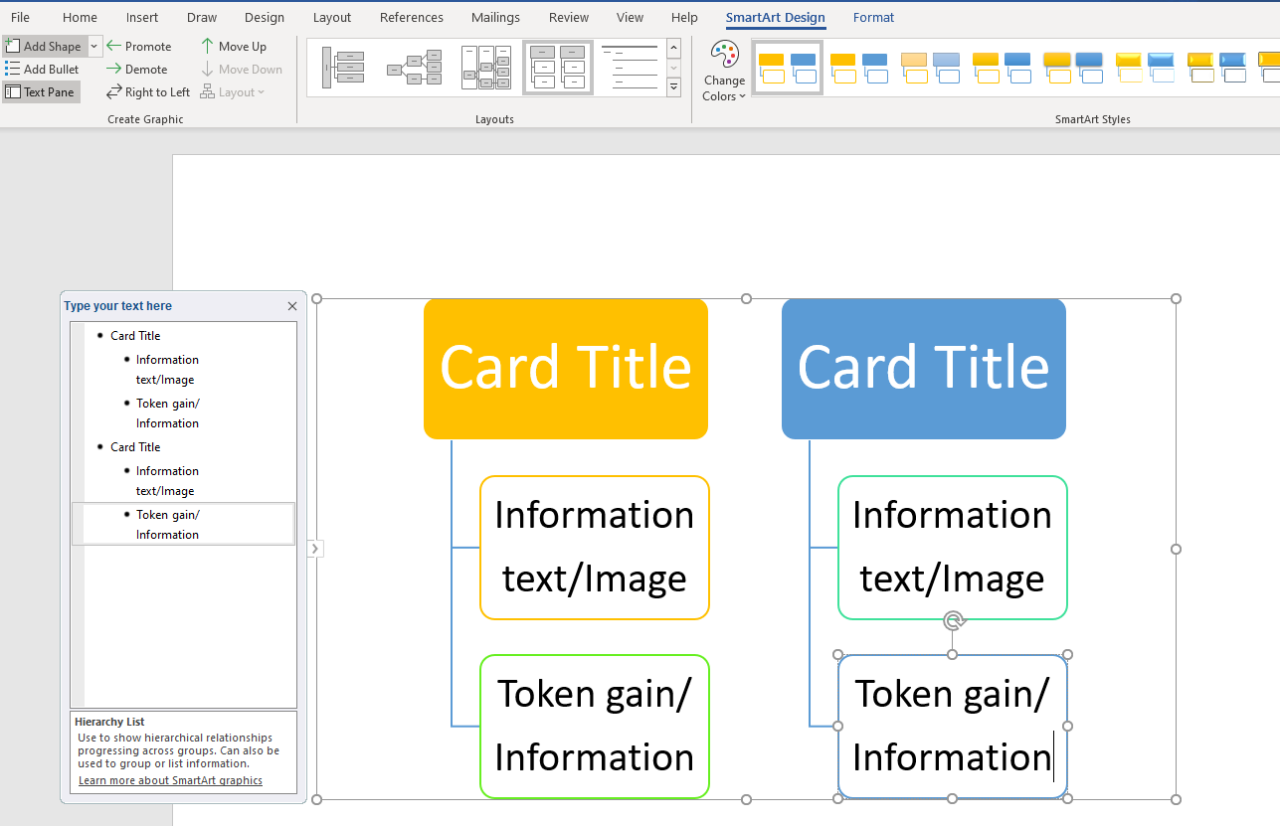
Word
Bored in your at-home office? Use your work tools for play! Open a new document and follow along….
Step 1
Click the “Insert” tab. Click on “Smart art”, then choose the kind of diagram that best fits what you want on the card. Hit “Ok”
Step 2
Fill in the cards with the information you want! You can also play around with colors +styles.
Step 3
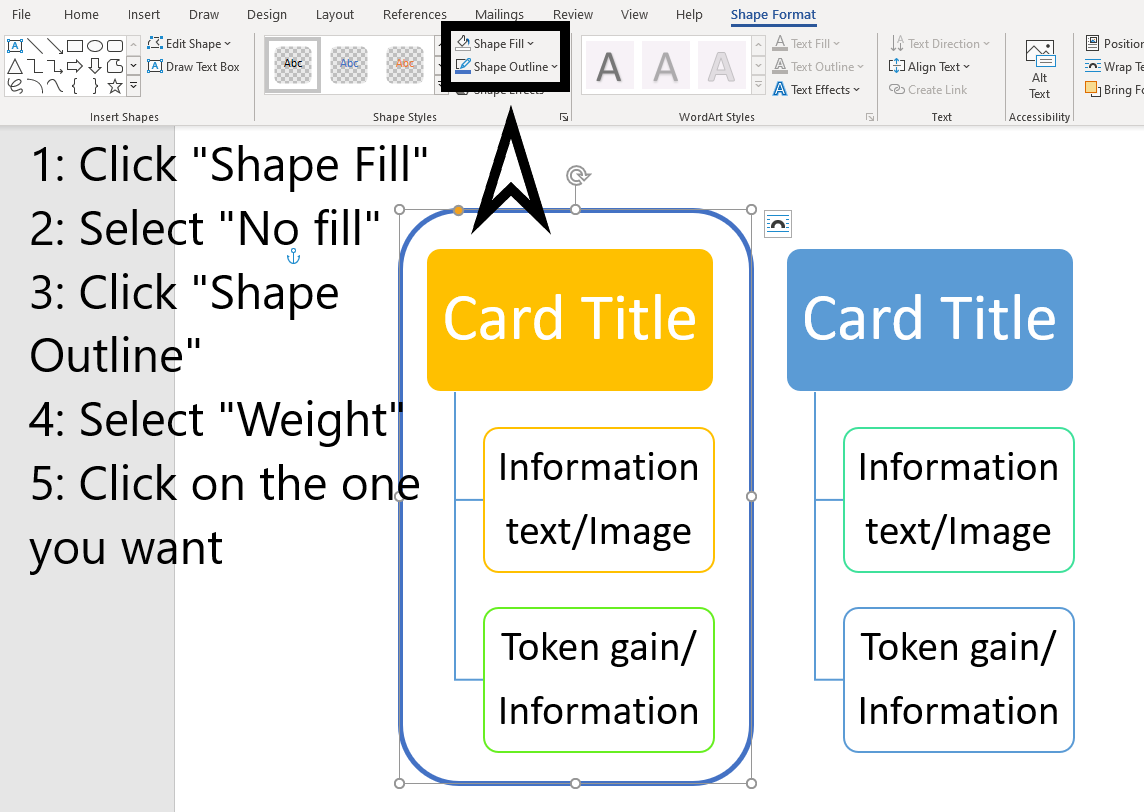
For a card outline/aesthetic: Go to the insert tab, hit “Shapes”. Choose any of the rectangle options (I recommend the rounded kind). Then, adjust the size to fit over what you’ve done.
Step 4
Click on the “Shape format” tab. You can play around with colors here! Click “Shape fill”, select “No fill”. This will give you the outline of your card! Then, if you want a different thickness for the outline, select “weight”, and then click on the number you want. Then, copy and paste your new shape, and move it over to the other Smart-art section.
Step 5
Go to the “Home” tab, and find the “Select” options. Select the drop-down, and hit “Select All”.
Copy the selection. Click below the cards you have and find the typing cursor ( I). Hit the Enter key until there is space after the cards. Paste your selection!
Step 6
Adjust your new cards until you’re happy, and then Print!
Decide on a theme, idea or concept that you want to explore.
Step 2
Decide on a Game end goal/ how one wins the game.
This is where counters come in. How many does one need to win? Are they part of winning, or do you use them to retrieve other cards?
Counter examples: Health points in Pokemon, a way to get assets in Netrunner, A way to count round victories (and bets in general) in Mahjong.
For the game I’m creating as an example, A certain number of each kind of token (Division and Romance) is needed to win the game.
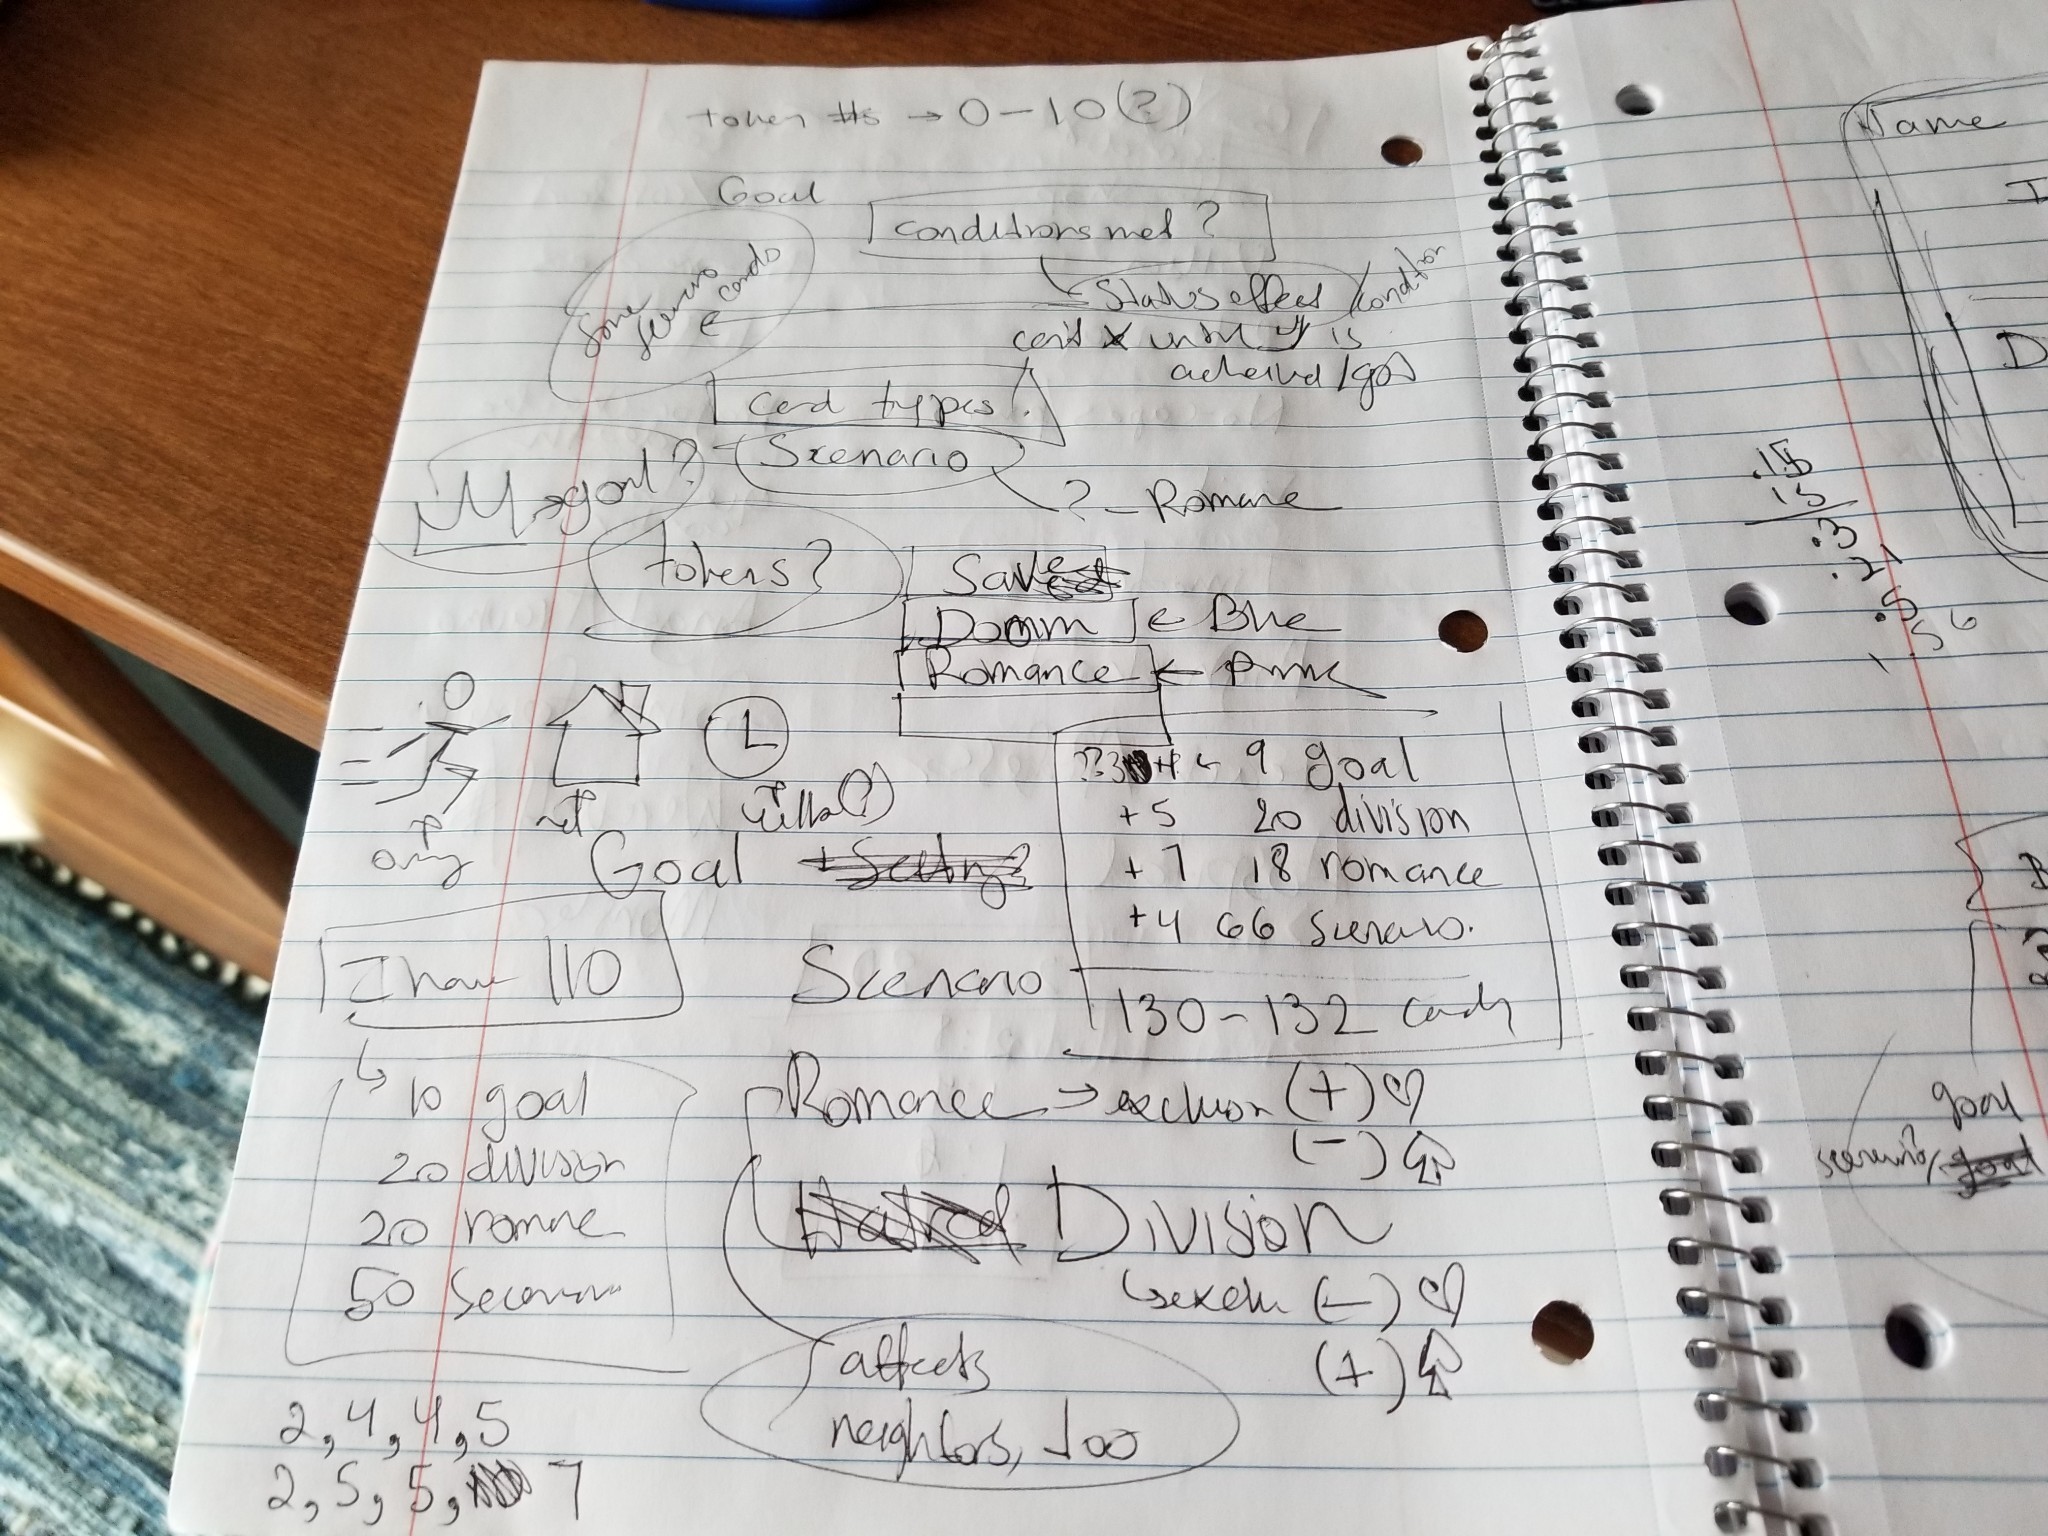
Me trying to figure out the end goal + playstyle
Step 3
Balance in these kinds of games can be tricky.
I suggest using existing proportions from other things as a guide. For example, using the way currency is divided as a basis for card-to-token ratios. Nickels to Dimes to Quarters (20:10:4), as token type 1: token type 2: total cards, if you don’t mind having numbered tokens (or just a whole pile of them). For the Example, to figure out how much of each type of card I wanted, I played off of the average number of fic tags on any one work, and decided that balancing between 7 and 12 might do me good. Again, there’s no need to worry; play time with the game will help figure out the kinks, or even talking about the design with other potential players.
A look at me trying to figure out what I wanted the proportions to look like, with some name brainstorming at the top
Step 4
Design the cards.
The key to games that require reading is to make sure your font is legible for all your players. Using Dyslexic-friendly fonts, and making sure that the text is at a good size, especially if your players are on the older side.
Color-coding your cards can help distinguish them. Since tokens are involved, it can help to add any symbols on the tokens to the corresponding cards.
I used excel to help me with this step!
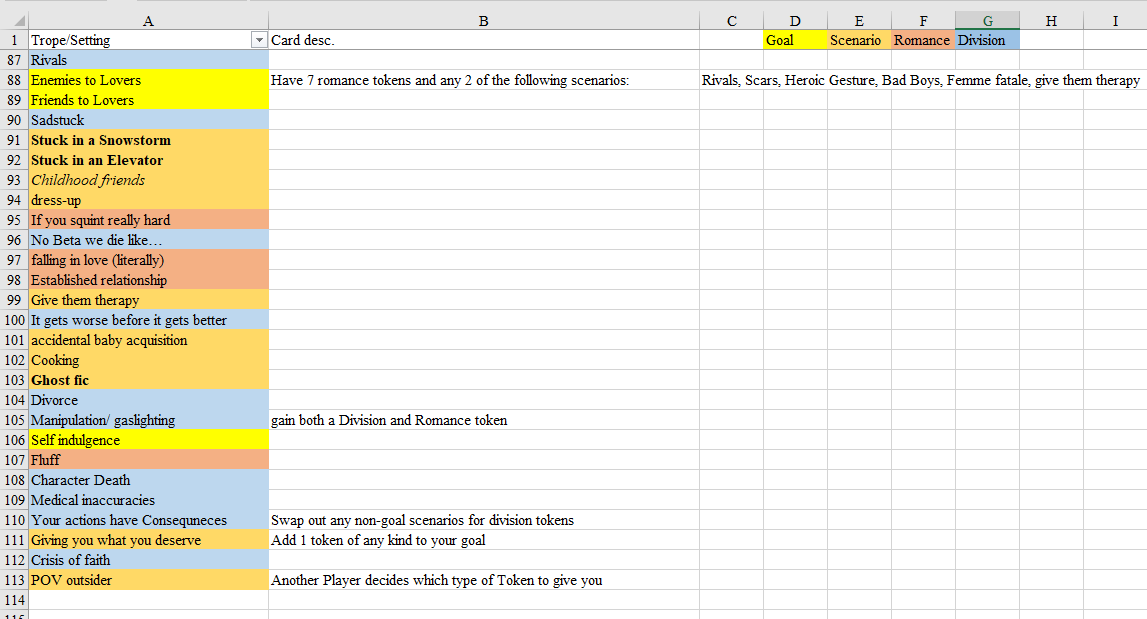
A sampling of card names + some descriptions-in-progress
The ruler on the top of this page was especially helpful in designing these
Feats are, boiled down, unique actions or abilities that one can do/have. A game that relies on feats over anything else generally has less reliance on stats or items, and is more about the imagery that comes from a more verbally-based adventure. Some videogames have them as part of a “talent tree”, in that feats have to be unlocked in a certain order. In these games, some trees are blocked off if you’ve chosen a certain role or path. Games can use feats to boost base skills, or allow more flexibility in the actions your character can take.
Why Feats?
Feats let players do another level of customization, and lets them use something that isn’t for numbers, necessarily. Feats can allow for more fun and can create unique Interactions between other characters and the environment around them.
How do I make ’em?
Feats tend to have limits of their usage in a certain time frame. That can help with balance in your game. A much stronger/ impressive feat will be given a longer time between uses than some thing simpler/weaker. One can also have a limit per game of times each feat (or all feats as a whole) can be used.
You can bring Balance to your game through keeping things consistent, watching the usefulness of the feats, and allowing the feats to have in-game importance. Consistency can refer to the description used; keeping the feats at a similar level of power and/or versatility will help keep the players at a compatible level. Usefulness is also a factor in balance and also, consistency. Are your feats tied directly to the gameplay? Are they more for Aesthetic purposes? How you choose to integrate those will be based on the type of play you and your players are looking for. A more light-hearted game for comedy reasons may choose to have silly, more aesthetic-based feats, that do more for conversation than plot, because that is what players are looking for.
Themes:
Themed around subject: What is unique to the chosen genre? What can only be done or be seen in the genre you choose? What tropes do you enjoy that can be integrated into your game?
Themed around the character’s species, for example, if the character is a merperson(triton, mermaid, generally aquatic), a feat can be “Once a day, the player can issue a command to nearby lake or sea creature. The creature must do a wisdom saving throw of at least 15 to resist”. The feat is unique to the specie’s upbringing and environment, and can lend flavor to an encounter.
Themed around the character’s job. Things that only that particular class can do, even split into subgroups of effect types. For example, a wizard. A Wizard feat could be being able to duplicate a spell, or change the effect type from fire to ice. Subgroup examples include: feats that effect weapons, feats that affect the Player, feats that affect other players/NPCs, feats that effect the environment.
Your game can be themed around the players. People enjoy things that are unique to them; it makes them feel empowered and even loved! Including something specific about those that you care about can be a way to make that connection be brimming with joy, adding a sparkle in their day!
What do I actually write down?
At the heart of it, you want a name and a description.
The name should be an accurate summary that piques the interest of the player.
The Description should be clear and concise.
It can be helpful to add in any identifying traits (like if the feat is specific to the species/job) beside the name.
How to make a card game from concept to completion
What do you enjoy in the card games that you play? What will entice others to play?
For this example, I tried to create a card game that my friends would play. They enjoy relatively simple games, that one can do while talking or conversing. I chose Uno to be the base game, as all agreed that that was their favorite game.
I like the aesthetic of tarot cards, so I also added in their number system (1-10, then page, knight, queen, and king).
I chose a theme, next. I enjoyed the tiktok trend of “vaguely terrifying beasts as pests that just bother you occasionally” as the theme, and boiled down their appearance to “Oblong form in mask”. Simplifying the appearance of the card’s design increases it’s readability. Making your images overly complex can confuse your players (or yourself when coloring them).
After deciding on those, it’s time to design the cards!
I chose to match the number of the figures to the number on the card, to keep it consistent visually. Other options include making the numbers of objects equal to the value of the card (ordinary 52-card deck), creating symbolism to match the value (most tarot cards), or even just putting the value of the card as the main focus (a-la- UNO).
Consistency is key to make sure the players can distinguish different groups of cards from each other while still recognizing it as part of the group.
Matching color-schemes or patterns is the common route to solve that problem!
For mine, each group (distinguished by color) has its own pattern as well. To make sure that all the cards -regardless of color- are read as from the same game/set, I used the same line-art for the base. Making all the figures the same helps tie the card set together.